


5 steps to integrate instant payment using Fincra Checkout API
Accept payment seamlessly on your next project!


Finding the perfect payment solution has always been the biggest nightmares for most developers. Connection timeout amongst other errors, make developers avoid taking on projects that involve cash flow. These projects include E-commerce, Payment platforms, business websites e.t.c
With the integration of Fincra's Checkout API, these payment errors become a thing of the past.
INTRODUCTION
The Fincra Checkout API enables you to integrate checkout in your application by using REST APIs. Upon integration, a payment modal is generated which allows potential clients or customers input their details and make payments. Simple and easy!
This post is intended for developers who want to build applications that can interact with Fincra Checkout API using JavaScript.
-1) CREATING CHECKOUT
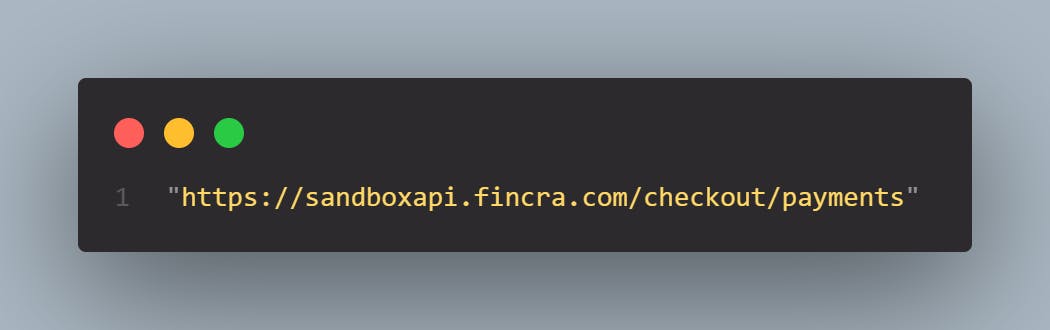
To get started with integrating Fincra's Checkout API in your web application, a post request is made to the checkout endpoint shown below.
-2) PASSING IN THE NECESSARY BODY PARAMS AND HEADERS
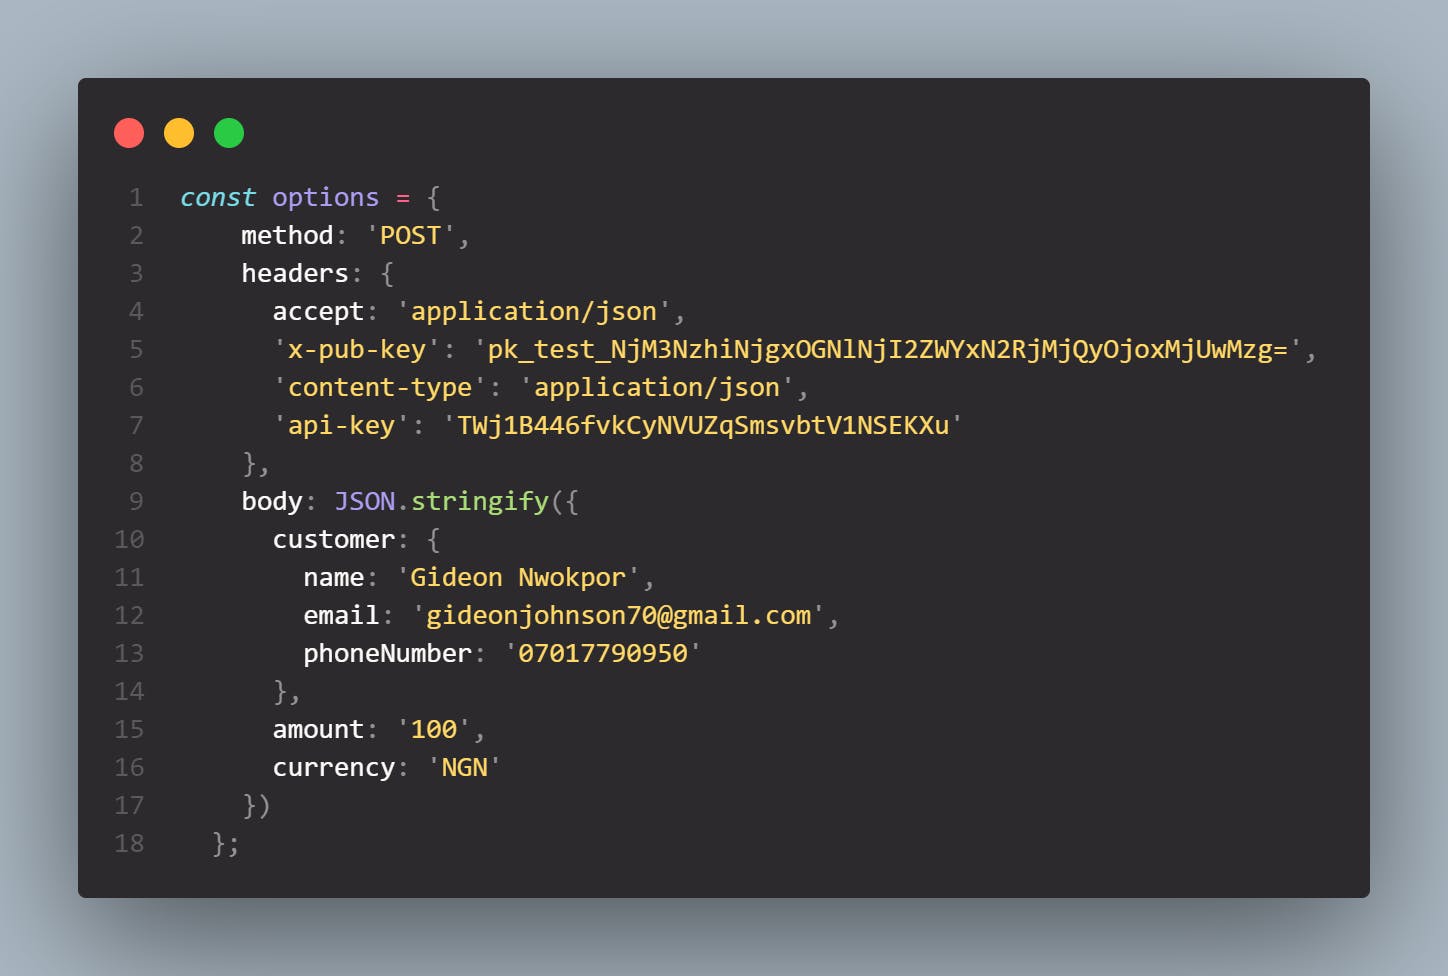
Along with the post request send to the API endpoint is the options object. The options object contains the method, headers, and body keys which hold their respective values.
The headers object is where necessary keys like the public key and api key needed to process the checkout is passed. Other necessary parameters are passed in the body key.
The body key is a JSON stringified (as I would like to call it) object, which contains necessary information of the user, which can be gotten from any input field in your app or directly from their profiles.
Below is a typical structure of the options object.
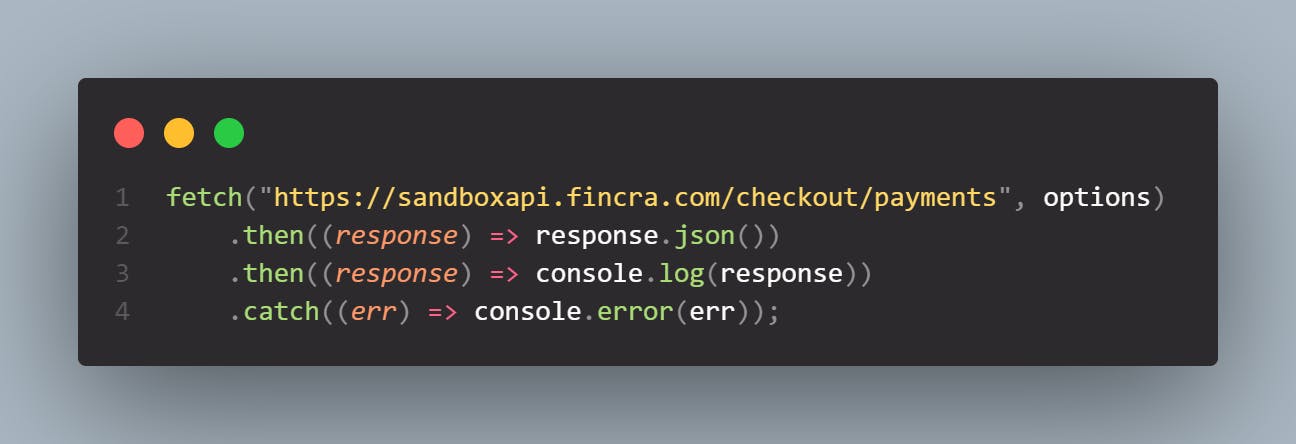
-3) USING THE FETCH API TO MAKE POST REQUESTS TO THE API RESPONSE
After creating the options object, a fetch request is made to the API endpoint and the corresponding response is logged to the console. Depending on the response, the request may either be rejected or successful. A status report of 400 depicts that the request failed, while a status report of 200 shows a successful transaction.
-4) WORKING WITH THE RESPONSE OBJECT
In our case, the response object below was gotten from the post request
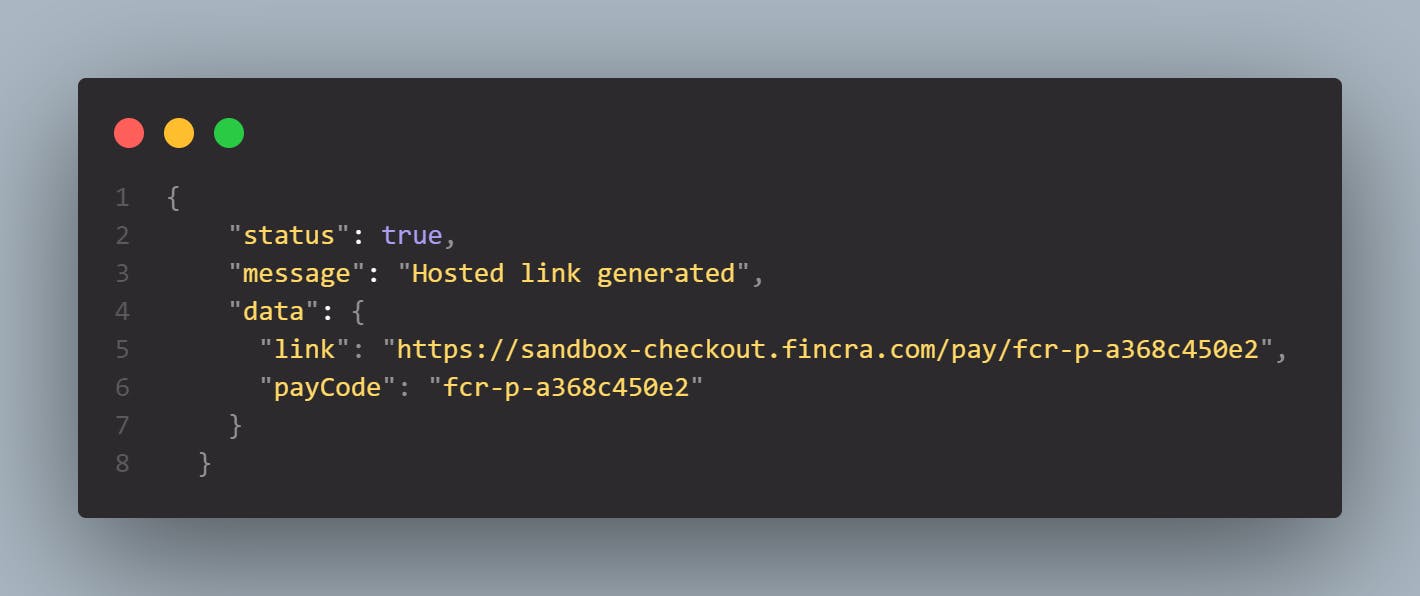
As seen above, a data object holds the link value as well as the paycode value. A conditional statement based on the response will help redirect the user to the generated payment link to make payments.

-5) MAKING PAYMENT USING THE PAYMENT LINK
After successfully redirecting client/customers to the payment links, Fincra Checkout API provides three(3) payment options for the customers to make payment.
- Card
- Bank Transfer
- PayAttitude
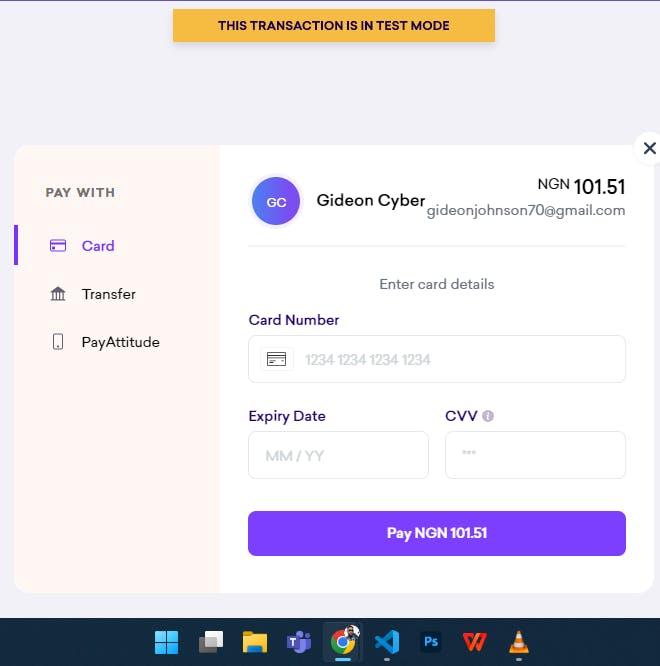
Customers can then input their card details and make payments.
CONCLUSION
The integration of checkout functionality in your web application has never been this easy, thanks to Fincra's Checkout API. Developers will no longer need to worry about endless errors and request failures when processing payments on their web applications.
For more info about Fincra's Checkout API, check their official documentation here
If you have any questions please let me know in the comment section.